Marshmallow Crispy Cookies Recipe
Introduction
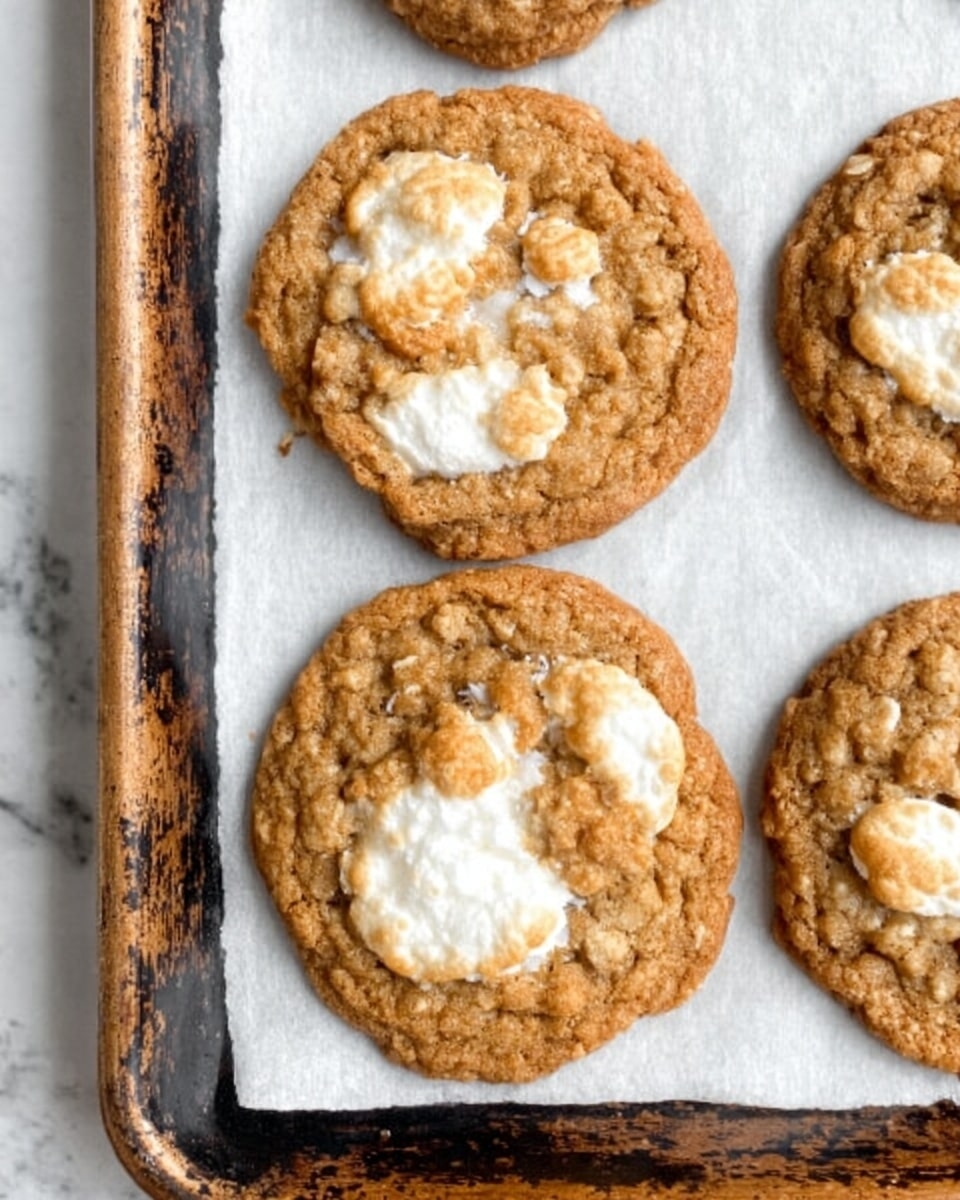
These Marshmallow Crispy Cookies combine the buttery richness of browned butter with the satisfying crunch of Rice Krispies and the chewy sweetness of mini marshmallows. Inspired by a popular store-bought treat, this homemade version is crispy, chewy, and delightfully flavorful.

Ingredients
- ½ cup (113.5 g) salted butter
- ¾ cup (165 g) brown sugar
- ½ cup (100 g) granulated sugar
- 1 large egg, room temperature
- 1 teaspoon vanilla (vanilla paste recommended if available)
- ½ teaspoon baking soda
- ¾ teaspoon salt
- 1 cup (158 g) + 2 tablespoons all-purpose flour
- 1½ cups (43 g) Rice Krispies cereal
- ⅔ cup (30 g) mini marshmallows
- Flaked salt for topping
Instructions
- Step 1: Preheat your oven to 350°F (175°C) and line a baking sheet with parchment paper.
- Step 2: Brown the butter by melting ½ cup in a medium saucepan over medium heat. Stir constantly as it foams and watch closely until it turns a golden brown color and smells nutty. Be careful not to burn it. Once browned, pour into a bowl and chill in the fridge or freezer for about 10 minutes to cool.
- Step 3: In a medium mixing bowl, combine the cooled browned butter with the brown sugar and granulated sugar. Add the egg and vanilla, then mix on low speed until smooth, about 30 seconds.
- Step 4: Gradually stir in the salt, baking soda, and flour. Mix gently to avoid overmixing the dough.
- Step 5: Fold in the Rice Krispies cereal followed by the mini marshmallows, ensuring they are evenly distributed.
- Step 6: Using a 3-tablespoon cookie scoop, form large balls of dough and place 4-5 on each prepared baking sheet, leaving plenty of space as the cookies will spread thin.
- Step 7: Bake for 10-13 minutes or until the edges are lightly golden brown. Avoid overbaking to keep the centers chewy.
- Step 8: Remove from the oven and immediately sprinkle with flaked salt. Let the cookies cool on the baking sheet before transferring to a wire rack.
Tips & Variations
- If you prefer a thicker cookie, add an extra 2 tablespoons of flour to the dough.
- For more precise measurements, use grams especially for flour. Lightly spoon flour into the measuring cup to avoid packing it.
- Chilling the dough for an hour before baking can help prevent excessive spreading and yield chewier cookies.
- Try using vanilla paste instead of extract for a more pronounced vanilla flavor.
Storage
Store the cookies in an airtight container at room temperature for up to 4 days. For longer storage, freeze baked cookies in a sealed container or bag for up to 3 months. You can freeze dough balls as well and bake them fresh by adding a few extra minutes to the baking time. To reheat, warm the cookies in a low oven (300°F / 150°C) for 5-7 minutes to restore softness.
How to Serve
Serve this delicious recipe with your favorite sides.
FAQs
Why do my cookies spread too much and become very thin?
These cookies are naturally thin due to the marshmallows and browned butter. To reduce spreading, chill the dough for at least an hour before baking and consider adding 2-3 tablespoons more flour. Using a smaller scoop can also help manage cookie size and thickness.
Can I make these cookies dairy-free or vegan?
While the original recipe uses salted butter, you can try substituting with margarine or a vegan butter alternative. The texture and flavor might vary slightly, but many have found this substitution works well for a dairy-free version.
PrintMarshmallow Crispy Cookies Recipe
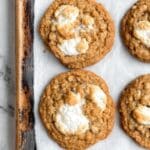
Marshmallow Crispy Cookies are a delightful blend of thin, buttery cookies filled with crunchy Rice Krispie cereal and chewy mini marshmallows. Featuring browned butter for a rich, nutty flavor and a sprinkle of flaked salt on top, these cookies offer a perfect balance of crispy edges and gooey centers. They’re inspired by Costco’s popular version but made at home for a fun and delicious treat.
- Prep Time: 15 minutes
- Cook Time: 12 minutes
- Total Time: 27 minutes
- Yield: 12 cookies 1x
- Category: Cookies
- Method: Baking
- Cuisine: American
Ingredients
Butter and Sugars
- ½ cup (113.5 g) salted butter
- ¾ cup (165 g) brown sugar
- ½ cup (100 g) granulated sugar
Wet Ingredients
- 1 large egg, room temperature
- 1 teaspoon vanilla extract or vanilla paste
Dry Ingredients
- ½ teaspoon baking soda
- ¾ teaspoon salt
- 1 cup (158 g) + 2 tablespoons all-purpose flour
Add-ins
- 1½ cups (43 g) Rice Krispie cereal
- ⅔ cup (30 g) mini marshmallows
- Flaked salt for topping
Instructions
- Preheat and Prepare: Preheat your oven to 350°F (177°C) and line a baking sheet with parchment paper to prevent sticking and ensure even baking.
- Brown the Butter: Melt ½ cup of salted butter in a medium saucepan over medium heat. Continue cooking past the melting point, stirring occasionally, until the butter foams and then turns a golden brown color with a nutty aroma. Watch carefully as it can burn quickly. Once browned, pour the butter into a bowl and chill in the fridge or freezer for about 10 minutes to cool slightly.
- Mix Sugars and Butter: In a medium mixing bowl, combine the cooled browned butter with brown sugar and granulated sugar. Mix well until smooth and combined.
- Add Egg and Vanilla: Add the egg and vanilla extract to the sugar and butter mixture. Mix on low speed until smooth, approximately 30 seconds, ensuring everything is fully incorporated.
- Add Dry Ingredients: Gradually mix in the salt, baking soda, and the flour. Stir carefully to combine, avoiding overmixing to keep the cookies tender.
- Fold in Cereal and Marshmallows: Gently fold in the Rice Krispie cereal followed by the mini marshmallows to ensure even distribution without crushing the cereal or melting the marshmallows.
- Shape Cookies: Using a 3-tablespoon cookie scoop, portion the dough into large balls. Place 4-5 cookies per baking sheet to allow room for spreading as these cookies are thin and will spread quite a bit during baking.
- Bake: Bake the cookies in the preheated oven for 10 to 13 minutes, or until the edges are lightly golden brown. Be careful not to overbake to preserve the chewy centers.
- Finish and Cool: Immediately after removing from the oven, sprinkle flaked salt on top of the cookies for a balance of sweet and salty flavors. Allow cookies to cool on the baking sheet before transferring to wire racks to cool completely.
Notes
- For thicker cookies, add an additional 2 tablespoons of flour to the dough.
- Measuring flour by weight (grams) is more precise; if using cups, lightly spoon flour into the cup rather than packing it.
- Chilling the dough for 1 hour before baking can help reduce spreading and yield a chewier cookie.
- Cookies can be frozen before or after baking, whichever is more convenient.
- Browned butter enhances the flavor with a nutty richness that elevates this cookie beyond the ordinary.
Keywords: marshmallow cookies, rice krispie cookies, browned butter cookies, chewy cookies, crispy cookies, homemade copycat Costco cookies