Creamy Chicken Stuffed Bell Peppers Recipe
Introduction
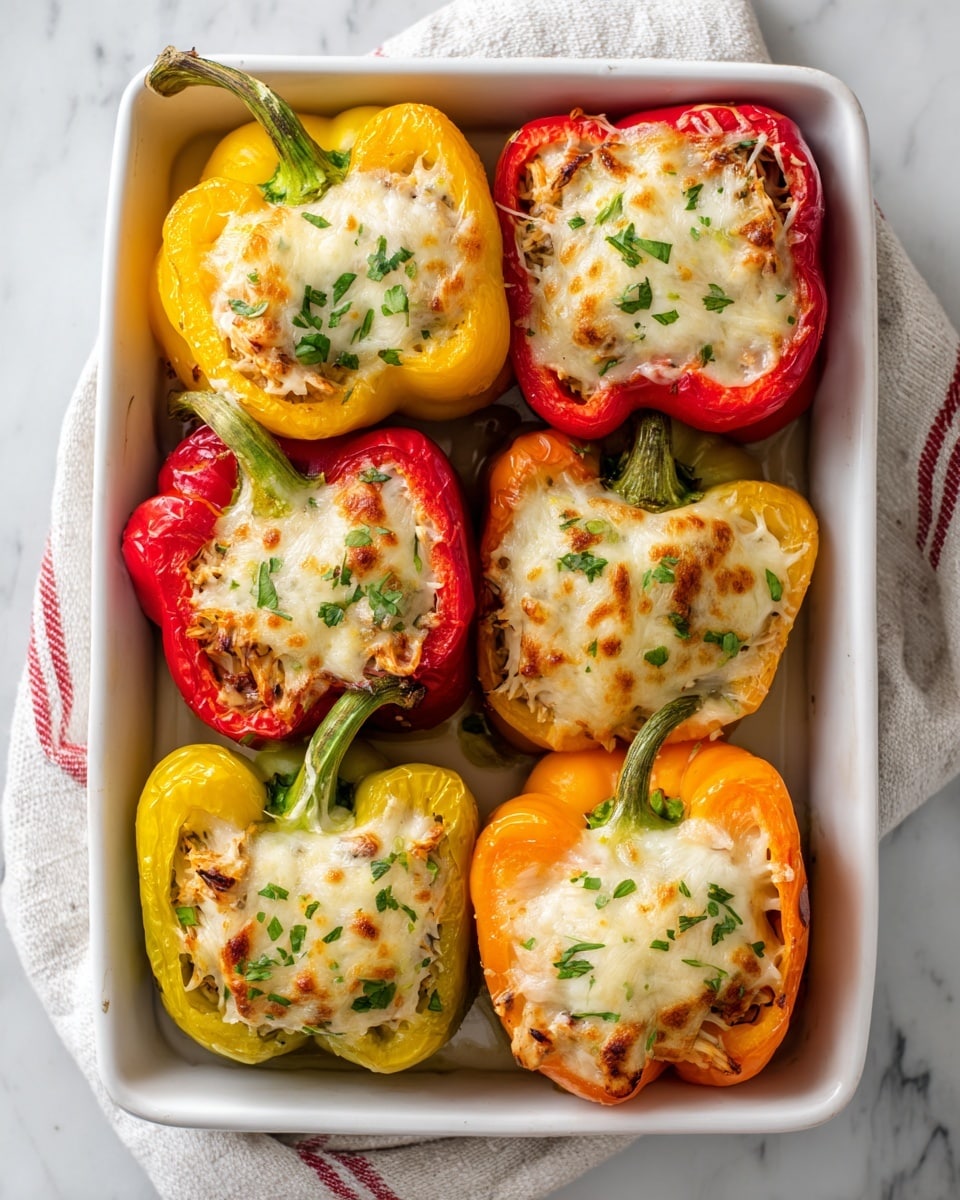
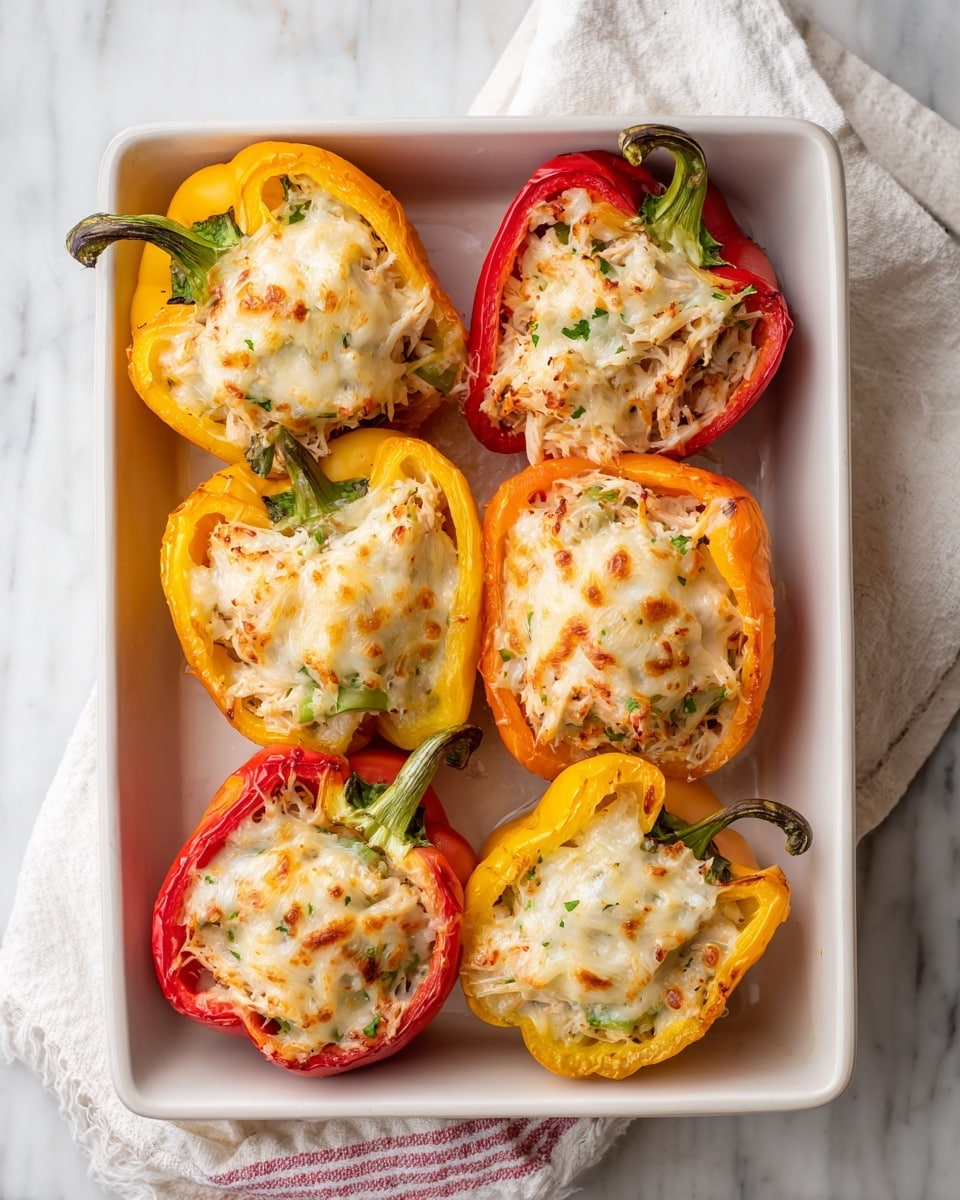
Creamy Chicken Stuffed Peppers are a delicious and satisfying dish that combines tender bell peppers with a savory chicken and cheese filling. This recipe is easy to prepare and perfect for a nutritious weeknight dinner.
Ingredients
- 3 bell peppers, halved, seeds and ribs removed
- 4 cups cooked chicken breast, shredded (about 2 chicken breasts)
- 1/2 cup salsa verde
- 4 oz reduced fat cream cheese (Philadelphia 1/3 Less Fat recommended)
- 4 oz reduced fat cheddar cheese, grated (Cabot Sharp Cheddar 75% Reduced Fat recommended)
- 1 tsp paprika
- 1/2 tsp onion powder
- 2 scallions, chopped
Instructions
- Step 1: Preheat the oven to 350°F (175°C).
- Step 2: Prepare the bell peppers by halving them and removing seeds and ribs.
- Step 3: In a mixing bowl, combine paprika, onion powder, cream cheese, salsa verde, and 3 oz of the grated cheddar cheese.
- Step 4: Fold in the shredded chicken breast and chopped scallions until well mixed.
- Step 5: Fill each pepper half evenly with the chicken and cheese mixture.
- Step 6: Sprinkle the remaining 1 oz of cheddar cheese on top of the filled peppers.
- Step 7: Cover the peppers with tented foil and bake for 45 minutes to 1 hour, or until the peppers are tender.
Tips & Variations
- For extra flavor, try adding a pinch of cumin or chili powder to the filling.
- Use different colored bell peppers for a vibrant presentation.
- Substitute cooked turkey for chicken for a leaner option.
- If you prefer a spicier dish, add diced jalapeños or a splash of hot sauce to the filling.
Storage
Store leftover stuffed peppers in an airtight container in the refrigerator for up to 3 days. Reheat gently in the oven or microwave until warmed through, covering to prevent drying out.
How to Serve
Serve this delicious recipe with your favorite sides.
FAQs
Can I prepare these stuffed peppers in advance?
Yes, you can assemble the peppers ahead of time and refrigerate them before baking. Just add a few extra minutes to the baking time if baking straight from the fridge.
Can I freeze creamy chicken stuffed peppers?
Yes, these stuffed peppers freeze well. Wrap them individually in foil or place in airtight containers and freeze for up to 2 months. Thaw overnight in the refrigerator before reheating.
PrintCreamy Chicken Stuffed Bell Peppers Recipe

These Creamy Chicken Stuffed Peppers are a delicious and healthy meal option featuring tender bell peppers filled with a flavorful mixture of shredded chicken, reduced-fat cream cheese, salsa verde, and cheddar cheese. Baked to perfection, this comforting dish delivers a perfect balance of creamy texture and zesty flavor, making it ideal for a nutritious weeknight dinner.
- Prep Time: 15 minutes
- Cook Time: 50 minutes
- Total Time: 1 hour 5 minutes
- Yield: 6 stuffed pepper halves 1x
- Category: Main Course
- Method: Baking
- Cuisine: American
- Diet: Low Fat
Ingredients
Peppers
- 3 bell peppers, halved, seeds and ribs removed
Filling
- 4 cups cooked chicken breast, shredded (equivalent to 2 chicken breasts)
- 1/2 cup salsa verde
- 4 oz reduced fat cream cheese (Philadelphia 1/3 Less Fat)
- 4 oz reduced fat cheddar cheese, grated (Cabot Sharp Cheddar 75% Reduced Fat)
- 1 tsp paprika
- 1/2 tsp onion powder
- 2 scallions, chopped
Instructions
- Preheat Oven: Preheat your oven to 350°F to prepare for baking the stuffed peppers evenly.
- Prepare Peppers: Half the bell peppers lengthwise and remove all seeds and ribs to create space for the filling.
- Mix Filling: In a bowl, combine paprika, onion powder, cream cheese, salsa verde, and 3 ounces of grated cheddar cheese. Mix until smooth and well blended.
- Add Chicken and Scallions: Fold shredded cooked chicken and chopped scallions into the cheese mixture, making sure everything is evenly incorporated.
- Stuff Peppers: Fill each pepper half with equal amounts of the chicken and cheese mixture.
- Top with Cheese: Sprinkle the remaining 1 ounce of grated cheddar cheese evenly over the stuffed peppers.
- Cover and Bake: Place the stuffed peppers on a baking dish and cover loosely with tented aluminum foil. Bake for 45 minutes to 1 hour, or until the peppers are tender and the filling is heated through.
Notes
- You can substitute salsa verde with mild salsa if preferred.
- For a spicier kick, add chopped jalapeños to the filling.
- Use a sharp cheddar or Mexican blend for more intense cheese flavor.
- Leftover stuffed peppers can be refrigerated and reheated in the oven.
- To make this recipe Gluten Free, ensure that all packaged ingredients are certified gluten free.
Keywords: creamy chicken stuffed peppers, baked stuffed peppers, healthy stuffed peppers, low fat chicken recipe, stuffed bell peppers