y Artisan Bread – The Best Homemade Loaf Recipe
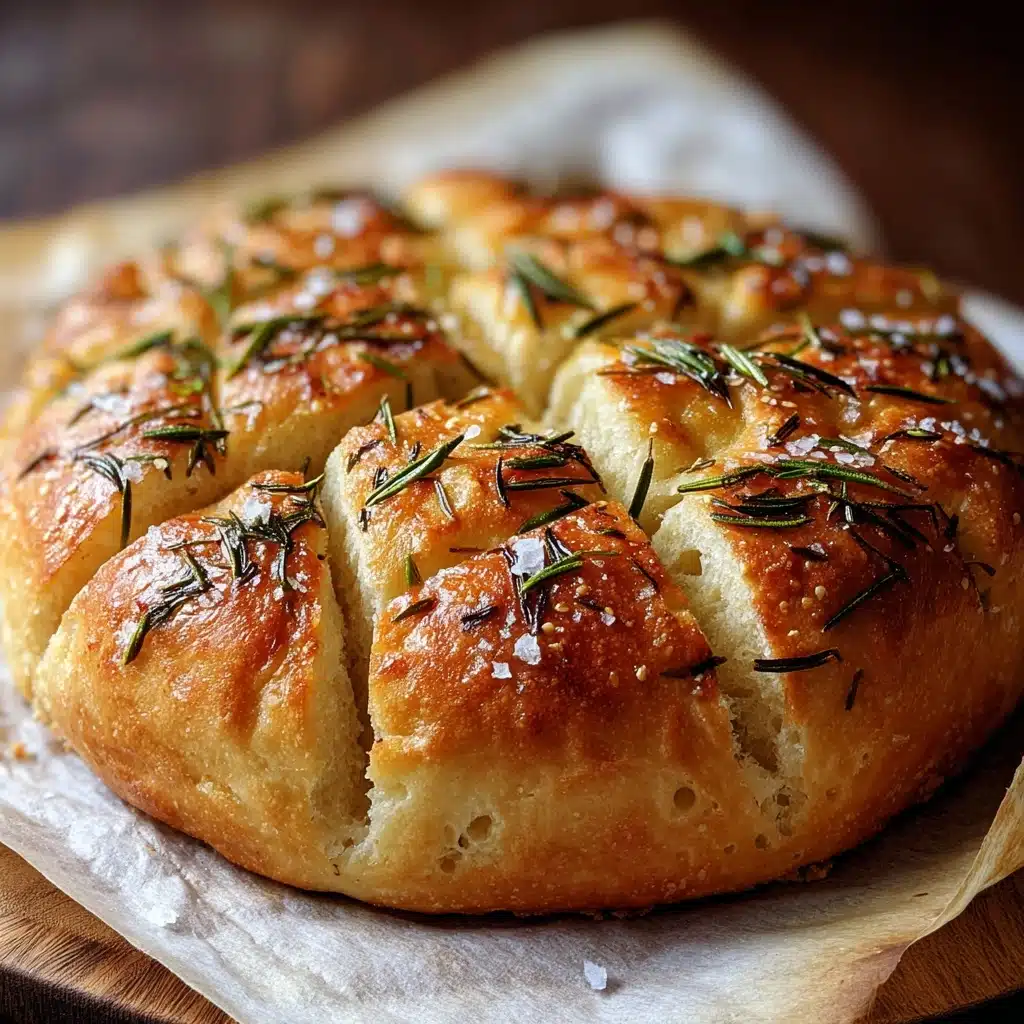
If you’ve ever dreamed of pulling a perfectly crusty, flavorful loaf out of your oven that fills your kitchen with the mouthwatering aroma of roasted garlic and fresh rosemary, then you are in for a treat with this recipe. This Easy Roasted Garlic Rosemary Artisan Bread – The Best Homemade Loaf combines simple ingredients that come together to create a loaf so irresistibly tender on the inside and beautifully crisp on the outside, it will quickly become your go-to bread recipe. Whether you’re a seasoned baker or a curious beginner, this recipe will guide you through each step to achieve that sublime artisan quality right at home.
Ingredients You’ll Need
Every ingredient in this recipe plays a crucial role in delivering that iconic artisan bread experience. From the aromatic rosemary to the perfectly roasted garlic, each element ensures balanced flavor, enticing aroma, and beautiful texture.
- Whole head of garlic: Roasting this softens the cloves and brings out a sweet, mellow flavor vital to the bread’s character.
- Extra-virgin olive oil: Divided use provides richness and helps with crust development.
- Coarse sea salt & freshly ground black pepper: Season the garlic before roasting to deepen taste complexity.
- Water (room temperature): Activates the yeast without shocking it, ensuring a perfect rise.
- Active dry yeast: The magical agent that gives your bread lift and lightness.
- Bread or all-purpose flour: The foundation of the dough that influences structure and chew.
- Dried oregano: Adds subtle herbal notes complementing the rosemary.
- Kosher or fine sea salt: Enhances every flavor element without overpowering.
- Fresh rosemary (finely chopped): Imparts piney fragrance and earthy depth, a signature of this loaf.
- Roasted garlic cloves (smashed): Folded into the dough for pockets of luscious flavor throughout.
How to Make y Artisan Bread – The Best Homemade Loaf
Step 1: Roast the Garlic
Begin by preheating your oven to 400°F (204°C). Slice the garlic head in half horizontally to expose the cloves. Drizzle the olive oil over the exposed garlic and sprinkle lightly with coarse salt and black pepper. Wrap the whole head tightly in foil and roast for about 40 minutes. This slow roasting transforms the pungent raw garlic into sweet, creamy cloves that infuse the bread with irresistible depth.
Step 2: Mix the Dough
While the garlic cools, dissolve your yeast in room temperature water and let it activate for 10 to 15 minutes until frothy. In a large bowl, combine your flour, kosher salt, oregano, and freshly chopped rosemary. Add in the roasted garlic cloves — smashed gently to release all their goodness — along with the activated yeast water and olive oil. Stir until you have a sticky dough that will develop that perfect crust and crumb texture.
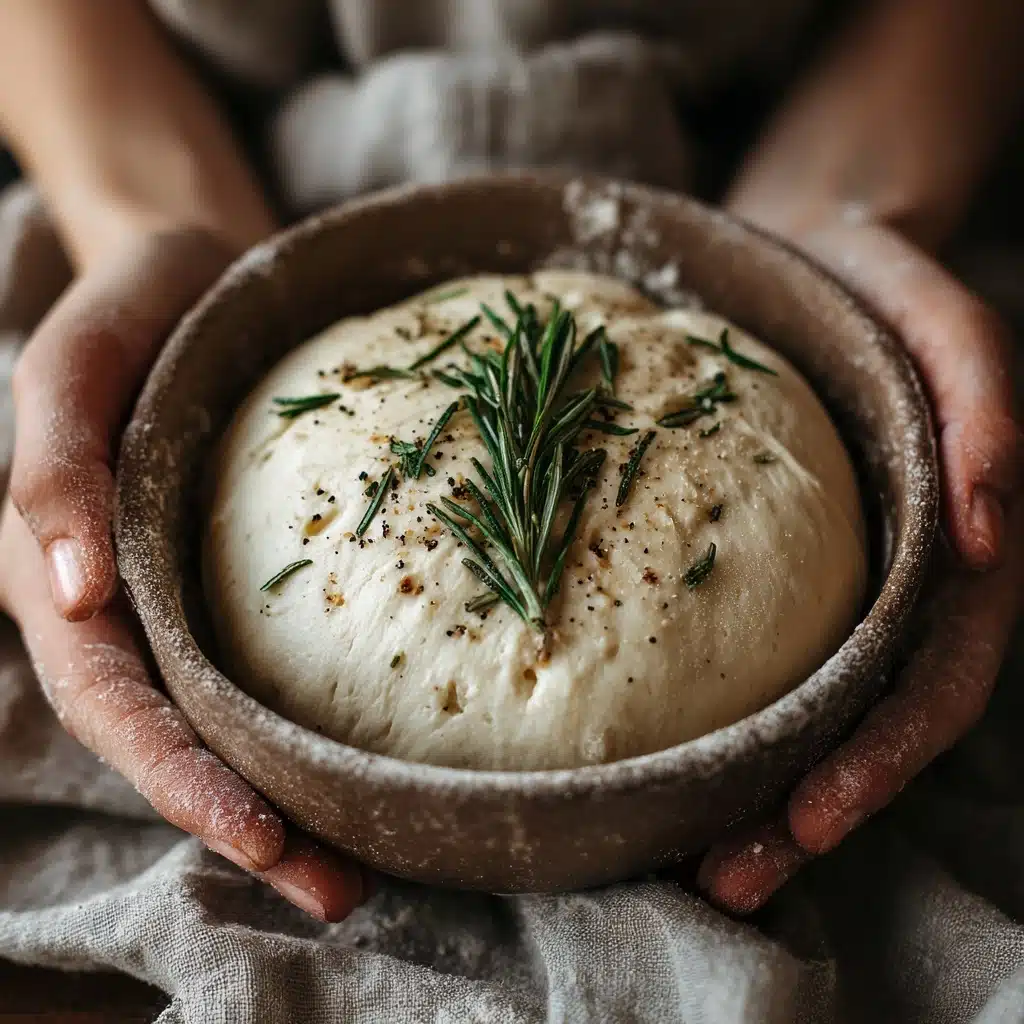
Step 3: First Rise
Cover the bowl with a clean kitchen towel and set it somewhere warm to rise for 8 to 10 hours. This long rise allows the flavors to meld beautifully while the dough doubles in size, becoming airy and full of promise.
Step 4: Shape and Cold Ferment
Gently turn your dough onto a floured surface and shape it into a smooth ball with care not to deflate it too much. Place it seam-side up in a well-floured bowl or banneton basket. Cover it again and pop it in the refrigerator for at least an hour, or up to 24 hours for the best flavor development. This cold fermentation enriches the bread with subtle tang and improved texture.
Step 5: Preheat Oven and Score Dough
Thirty to sixty minutes before baking, preheat your oven to 450°F (232°C), making sure you have a Dutch oven inside to heat up. When your dough is ready, remove it from the fridge, invert it gently onto a piece of parchment paper so it rests seam-side down, and use a sharp blade to score shallow cuts across the top. This not only helps the bread expand artistically but also encourages even baking.
Step 6: Bake
Carefully transfer the dough with the parchment paper into the hot Dutch oven. Place the lid on and bake for 30 minutes to trap steam, which gives the crust that coveted crunch. After the lid is off, continue baking for another 15 to 20 minutes until the crust turns a gorgeous golden brown.
Step 7: Cool and Slice
Once baked, remove your artisan masterpiece from the Dutch oven and let it cool on a wire rack for at least an hour. This resting time ensures the crumb sets perfectly and keeps the bread from becoming gummy when sliced.
How to Serve y Artisan Bread – The Best Homemade Loaf
Garnishes
A few sprigs of fresh rosemary on the side can accentuate the herbaceous notes baked into the loaf. A light brush of olive oil or a sprinkle of flaky sea salt over slices just before serving adds a gently savory finish that’s hard to resist.
Side Dishes
This bread shines alongside a simple bowl of tomato soup, a robust stew, or a fresh salad. Its crunchy crust and soft interior are the perfect match to scoop, dip, and savor for any meal of the day.
Creative Ways to Present
Consider slicing the bread thick and toasting it with garlic butter for an extra indulgent treat or using it to create an upscale grilled cheese sandwich. For gatherings, serve torn chunks in a rustic basket alongside homemade spreads like herbed cream cheese or olive tapenade to get everyone dipping and devouring.
Make Ahead and Storage
Storing Leftovers
To keep y Artisan Bread – The Best Homemade Loaf fresh for days, store it at room temperature in a paper bag or wrapped in a clean kitchen towel. This helps maintain the crust’s crunch while preventing the crumb from drying out too quickly.
Freezing
If you want to enjoy this beautiful loaf later, slice it and freeze the pieces in an airtight container or freezer bag. This prevents freezer burn and keeps the bread tasting just as fresh when you thaw it.
Reheating
Reheat slices in a toaster oven or regular oven at 350°F (175°C) for 5 to 10 minutes to refresh the crust and warm the soft inside. Avoid microwaves since they tend to make artisan bread chewy or tough.
FAQs
Can I use all-purpose flour instead of bread flour?
Absolutely! While bread flour gives a slightly chewier texture due to its higher protein content, all-purpose flour works perfectly for this recipe and still yields a delicious loaf with a lovely crumb.
How long does the first rise need to be?
The first rise should be about 8 to 10 hours at room temperature. This slow fermentation is key for flavor and texture, but if you’re in a rush, you could do a shorter rise and accept a milder taste.
Why do I need to roast the garlic?
Roasting transforms raw garlic’s sharpness into a soft, sweet flavor that melds nicely with the rosemary. It ensures the garlic doesn’t overpower the bread and creates those savory, mellow pockets throughout the loaf.
Is the Dutch oven essential for baking this bread?
While a Dutch oven is ideal for creating steam and a crisp crust, you can use a baking stone or sheet with a pan of water in the oven to generate steam. Just be aware that the crust may not be quite as crisp as when using a covered Dutch oven.
Can I add extra herbs or seeds?
Definitely! This recipe is quite adaptable. Adding things like thyme, sesame seeds, or even olives can be delicious. Just be sure to adjust quantities so the extra ingredients complement rather than overpower the delicate balance of flavors.
Final Thoughts
There is something truly magical about baking your own artisan bread at home, and this Easy Roasted Garlic Rosemary Artisan Bread – The Best Homemade Loaf is a shining example of how simple ingredients and a little patience can produce such incredible results. Once you slice into that golden crust and reveal the soft, fragrant crumb, you’ll understand why this recipe wins hearts and becomes a staple. I can’t wait for you to make it your own and share the joy of this exceptional homemade loaf with those you love!
Printy Artisan Bread – The Best Homemade Loaf Recipe
This Easy Roasted Garlic Rosemary Artisan Bread recipe delivers a flavorful, crusty homemade loaf infused with aromatic roasted garlic and fresh rosemary. Perfect for sandwiches, dipping, or enjoying with butter, this no-fuss bread requires simple ingredients and minimal hands-on time, offering a rustic touch to your baking repertoire.
- Prep Time: 20 minutes (excluding rising and refrigeration time)
- Cook Time: 50 minutes
- Total Time: 9 to 59 hours (depending on fermentation time in fridge)
- Yield: 1 loaf (about 10–12 slices) 1x
- Category: Bread
- Method: Roasting, Baking, Fermentation
- Cuisine: Artisan European-style
- Diet: Vegetarian
Ingredients
For the Bread Dough:
- 1 whole head garlic
- 1 tablespoon extra-virgin olive oil (divided)
- Coarse sea salt & freshly ground black pepper, to taste
- 1½ cups water (room temperature, ~70°F / 21°C)
- 1 teaspoon active dry yeast
- 3 cups bread or all-purpose flour (plus more for dusting)
- ½ teaspoon dried oregano
- 1 teaspoon kosher or fine sea salt
- 2 teaspoons finely chopped fresh rosemary (plus more for topping)
- 1 head roasted garlic cloves (smashed)
Instructions
- Roast the Garlic: Preheat your oven to 400°F (204°C). Cut the garlic head in half horizontally to expose the cloves, drizzle them with olive oil, and sprinkle with coarse sea salt and freshly ground black pepper. Wrap the garlic tightly in aluminum foil and roast in the oven for 40 minutes until soft and caramelized. Allow to cool, then remove the roasted cloves from their skins for use in the dough.
- Mix the Dough: In a small bowl, dissolve 1 teaspoon of active dry yeast into 1½ cups of room temperature water (~70°F or 21°C) and let it sit for 10–15 minutes until frothy. In a large mixing bowl, combine 3 cups of bread or all-purpose flour, 1 teaspoon kosher salt, ½ teaspoon dried oregano, and 2 teaspoons finely chopped fresh rosemary. Add the yeast mixture, roasted garlic cloves (smashed), and half of the olive oil. Stir with a spatula until the dough comes together into a sticky mass.
- First Rise: Cover the bowl with a clean kitchen towel and let the dough rise at room temperature for 8–10 hours, or until it has doubled in size and shows lots of bubbles on the surface, indicating proper fermentation.
- Shape and Cold Ferment: Lightly flour your work surface and gently turn the risen dough out onto it. Shape the dough into a tight ball by folding the edges underneath gently. Place the shaped dough seam-side up into a floured bowl or proofing basket. Cover and refrigerate for 1 to 24 hours; you can extend this up to 48 hours for a deeper flavor development.
- Preheat Oven & Score: About 45 minutes before baking, preheat your oven to 450°F (232°C) with a Dutch oven inside to heat. Remove the dough from the fridge, carefully invert it seam-side down onto a piece of parchment paper. Use a sharp blade to score the top of the dough with a few slashes to allow expansion during baking.
- Bake: Using the parchment paper as a sling, transfer the dough into the hot Dutch oven. Cover with the lid and bake for 30 minutes. Then uncover and bake for an additional 15–20 minutes until the bread is a deep golden brown and crusty.
- Cool & Slice: Remove the bread from the Dutch oven and place it on a wire rack. Allow it to cool completely for at least 1 hour before slicing to ensure the crumb sets properly and the flavors develop fully.
Notes
- Room temperature water is key to activate the yeast without killing it.
- Long, slow fermentation in the fridge improves flavor and texture significantly.
- Using a Dutch oven mimics a professional steamy oven environment for a crispy crust.
- Letting the bread cool completely prevents gummy texture inside when sliced.
- Adjust garlic quantity to taste for a milder or stronger garlic flavor.
Nutrition
- Serving Size: 1 slice (approximately 60g)
- Calories: 190 kcal
- Sugar: 0.5 g
- Sodium: 270 mg
- Fat: 3 g
- Saturated Fat: 0.4 g
- Unsaturated Fat: 2.6 g
- Trans Fat: 0 g
- Carbohydrates: 36 g
- Fiber: 2 g
- Protein: 6 g
- Cholesterol: 0 mg
Keywords: Roasted garlic bread, artisan bread recipe, homemade bread, rosemary bread, easy bread dough, no-knead bread, Dutch oven bread