Garlic Herb Dutch Oven Bread Recipe
Introduction
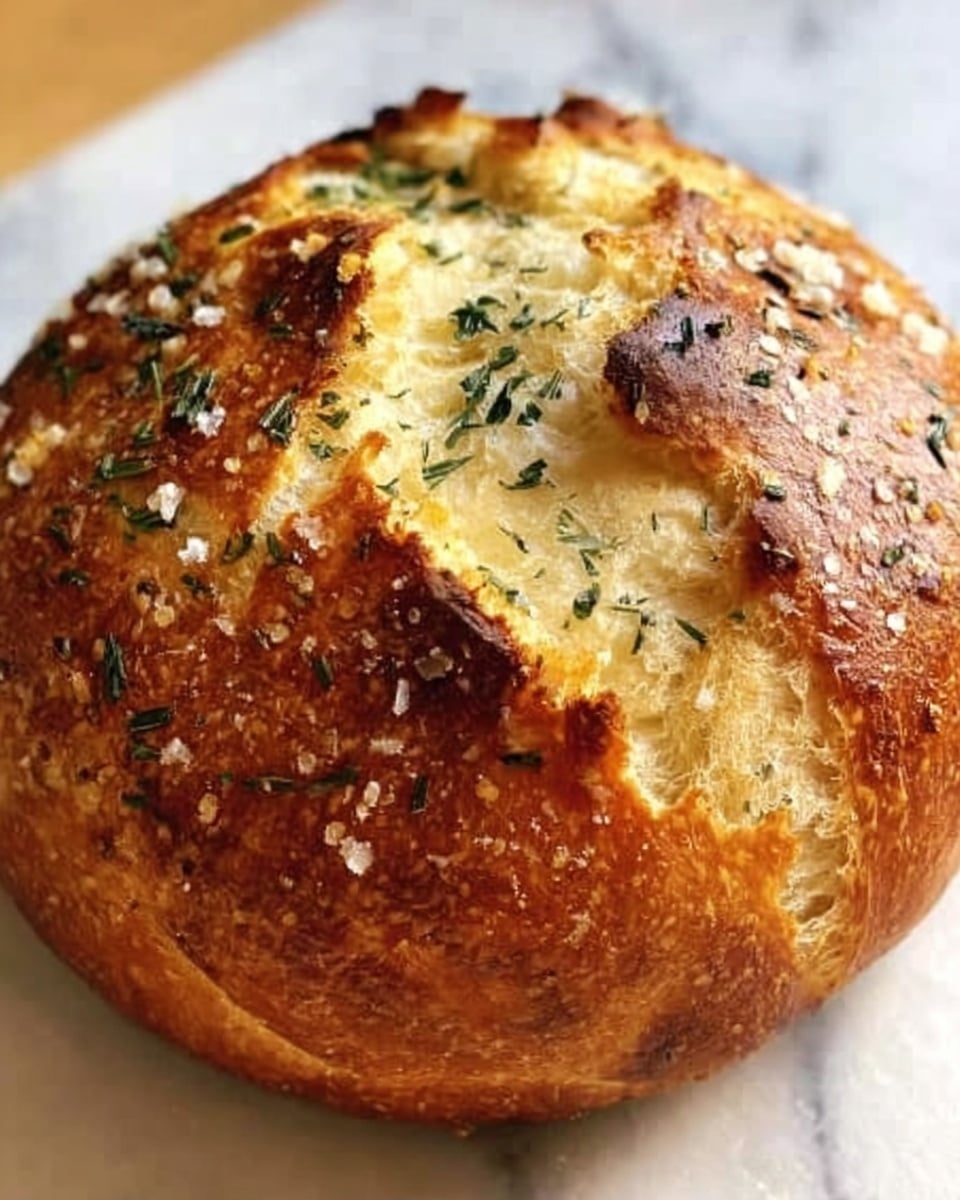
Crusty on the outside and soft on the inside, this Garlic Herb Dutch Oven Bread bakes to golden perfection with minimal effort. Infused with fresh garlic and herbs, it brings artisan bakery quality straight to your kitchen.
Ingredients
- 3 cups (375g) all-purpose flour, plus extra for dusting
- 2 teaspoons (10g) fine sea salt
- 1/2 teaspoon (2g) instant yeast (not active dry)
- 1 1/2 cups (355ml) lukewarm water (around 90-100°F)
- 4 cloves garlic, minced finely or pressed
- 2 tablespoons (8g) fresh herbs (rosemary, thyme, or a combination), chopped finely
- 1 tablespoon (15ml) olive oil, for coating
Instructions
- Step 1: In a large mixing bowl, whisk together the flour, salt, and instant yeast until evenly distributed. Add the minced garlic and chopped fresh herbs, stirring them throughout the dry mixture. Pour in the lukewarm water and use a wooden spoon or sturdy spatula to stir everything together until no dry flour remains visible. The mixture will look rough and sticky rather than smooth. Cover the bowl tightly with plastic wrap or a damp kitchen towel.
- Step 2: Place your covered bowl in a draft-free spot at room temperature for 12-18 hours. The dough should roughly double in size and show bubbles across the surface when ready. It will appear loose, bubbly, and slightly jiggly when gently shaken.
- Step 3: Generously flour a clean work surface and your hands. Gently scrape the dough onto the floured surface without deflating it too much. With floured hands, fold the edges of the dough toward the center, rotating as you go, to create a round shape. Flip the dough seam-side down onto a lightly oiled piece of parchment paper. Cover loosely with a kitchen towel and let rest for 45 minutes to 1 hour.
- Step 4: About 30 minutes before the dough finishes its second rise, place your Dutch oven with the lid inside your oven and preheat to 450°F (232°C). This step is crucial for developing the perfect crust.
- Step 5: Using oven mitts, carefully remove the hot Dutch oven from the oven. Remove the lid and, using the parchment paper as a sling, lower the dough into the pot. Score the top of the dough with one or two cuts about 1/2 inch deep using a sharp knife or bread lame. Cover with the lid and return to the oven.
- Step 6: Bake covered for 30 minutes to trap steam that promotes oven spring and crust development. Remove the lid carefully and bake uncovered for another 15-20 minutes until the crust is deep golden brown. The internal temperature should reach 205-210°F if using a thermometer.
- Step 7: Remove the bread from the Dutch oven using the parchment edges or a spatula. Transfer to a wire rack and cool completely for at least 30 minutes before slicing to avoid a gummy texture and allow the crust to “sing.”
Tips & Variations
- For a cheesy twist, fold 1 cup shredded parmesan, gruyere, or aged cheddar into the dough along with the herbs for rich, savory pockets throughout the bread.
- Replace up to half the all-purpose flour with whole wheat flour for a nuttier loaf; add 2-3 tablespoons more water to compensate for absorption.
- Use roasted garlic instead of raw for a sweeter, milder garlic flavor by squeezing out 10-12 cloves from the skins and mashing them into the dough.
- Resist adding extra flour; the dough should remain wet and sticky to create an open, airy crumb with beautiful air pockets.
- Preheat the Dutch oven fully for 30 minutes to ensure the best oven spring and crust.
Storage
Store cooled bread at room temperature for 2-3 days wrapped in a clean kitchen towel or paper bag to maintain crustiness. Avoid plastic bags which soften the crust. For longer storage, slice and freeze the bread for up to 3 months; toast slices directly from frozen for quick garlic bread.
How to Serve

Serve this delicious recipe with your favorite sides.
FAQs
Can I use active dry yeast instead of instant yeast?
Yes, substitute active dry yeast in the same amount, but dissolve it in lukewarm water first and let sit for 5 minutes until foamy before mixing with flour. Rising times remain the same.
What if I don’t have a Dutch oven?
You can bake the bread on a preheated pizza stone or heavy baking sheet. Place a metal pan with 1 cup boiling water on the oven’s bottom rack to create steam. The crust won’t be as crispy but will still taste great.
PrintGarlic Herb Dutch Oven Bread Recipe
This Garlic Herb Dutch Oven Bread recipe yields a crusty, golden artisan loaf infused with fresh garlic and herbs. Made with minimal yeast and long fermentation, it develops deep flavor and a light, airy crumb. Baking it in a preheated Dutch oven creates a perfect crackly crust reminiscent of bakery-style bread.
- Prep Time: 20 minutes
- Cook Time: 50 minutes
- Total Time: 13-19 hours
- Yield: 1 loaf (about 1.5 pounds) 1x
- Category: Bread
- Method: Baking
- Cuisine: American/Artisan
- Diet: Vegetarian
Ingredients
For the Bread Dough:
- 3 cups (375g) all-purpose flour, plus extra for dusting
- 2 teaspoons (10g) fine sea salt
- 1/2 teaspoon (2g) instant yeast (not active dry)
- 1 1/2 cups (355ml) lukewarm water (around 90-100°F)
- 4 cloves garlic, minced finely or pressed
- 2 tablespoons (8g) fresh herbs (rosemary, thyme, or a combination), chopped finely
- 1 tablespoon (15ml) olive oil, for coating
Instructions
- Mix Your Dough: In a large bowl, whisk together flour, salt, and instant yeast evenly. Stir in minced garlic and chopped fresh herbs. Pour in lukewarm water and mix with a wooden spoon until no dry flour remains; the dough will be sticky and rough. Cover tightly with plastic wrap or damp towel.
- Let It Rise: Place the covered bowl in a draft-free spot at room temperature for 12-18 hours until the dough roughly doubles in size and is bubbly on top.
- Shape the Dough: Generously flour your work surface and hands. Gently scrape dough onto the surface without deflating it. Fold edges toward the center to form a round ball. Flip seam-side down onto lightly oiled parchment paper. Cover loosely and let rest for 45 minutes to 1 hour.
- Preheat Your Dutch Oven: Place your Dutch oven with the lid in a 450°F (232°C) oven 30 minutes before the dough’s second rise finishes to preheat thoroughly.
- Score and Bake: Carefully remove the hot Dutch oven. Using the parchment paper as a sling, lower the dough into the pot. Score the top of the loaf with a sharp knife or lame about 1/2 inch deep. Cover with the lid.
- Bake Covered, Then Uncovered: Bake covered for 30 minutes to trap steam, then remove the lid and bake an additional 15-20 minutes uncovered until deep golden brown and internal temperature reaches 205-210°F.
- Cool Completely: Remove bread from Dutch oven and transfer to a wire rack. Let cool at least 30 minutes before slicing to allow internal cooking and prevent gummy texture.
Notes
- The dough should be wet and sticky; resist adding extra flour.
- Preheating the Dutch oven is essential for crust development and oven spring.
- Long fermentation of 12-18 hours develops flavor and texture; adjust time based on ambient temperature.
- Use instant yeast, or substitute with active dry yeast by proofing in water before mixing.
- If no Dutch oven, use a preheated pizza stone with a pan of boiling water to create steam.
- Store bread wrapped in a towel or paper bag at room temperature for 2-3 days; freeze for longer storage.
- Common variations include adding cheese, using whole wheat flour, or substituting roasted garlic for raw.
Keywords: Garlic Herb Bread, Dutch Oven Bread, Artisan Bread, No Knead Bread, Herb Bread, Garlic Bread, Homemade Bread