Maple Oat Sourdough Bread Recipe
Introduction
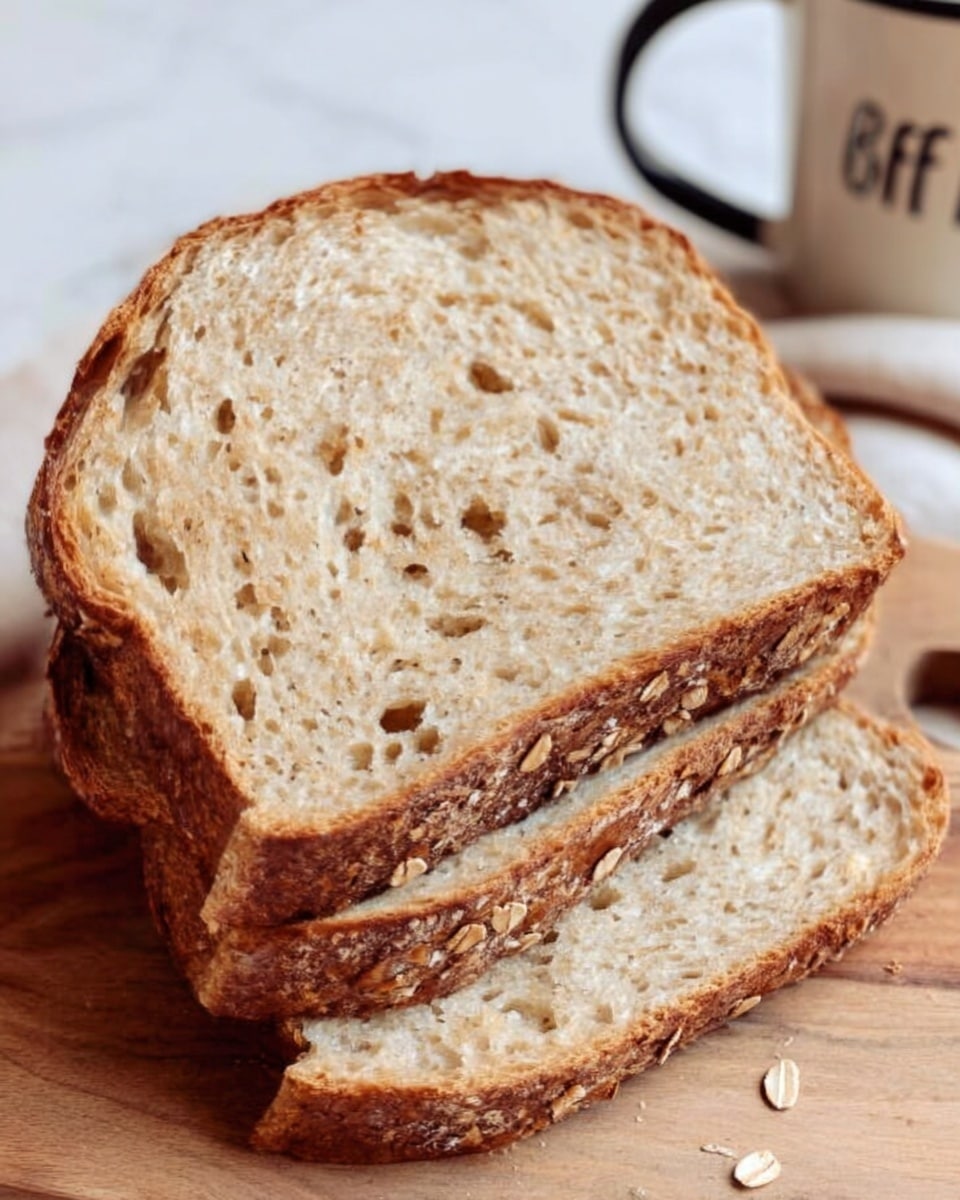
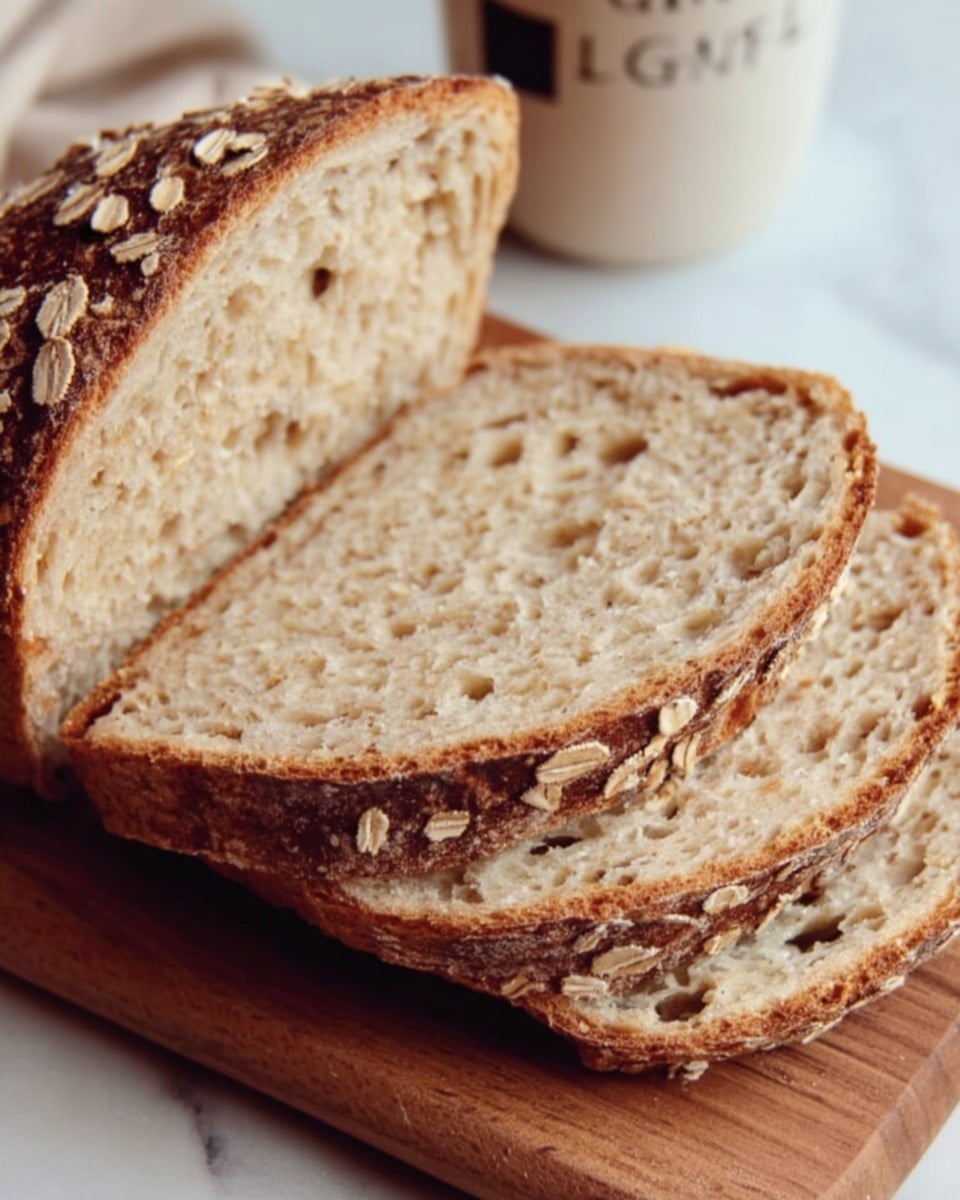
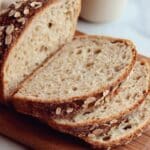
Maple Oat Sourdough Bread combines the hearty texture of oats with the subtle sweetness of maple syrup, creating a uniquely flavorful loaf. This slow-fermented bread is perfect for breakfast or as a cozy snack any time of day.
Ingredients
- 1 cup (80 grams) rolled oats
- ½ cup (120 grams) hot water
- 1 ¼ cups (300 grams) warm water (80-90℉)
- ½ cup (100 grams) active sourdough starter
- ¼ cup (85 grams) maple syrup
- 1 teaspoon maple syrup extract (optional, for stronger maple flavor)
- 4 cups (480 grams) bread flour
- 4 teaspoons (11 grams) Diamond Crystal Kosher Salt (use 2 teaspoons if using Morton’s or table salt)
- Rice flour for dusting proofing basket
- 2 ice cubes for steam
Instructions
- Step 1: About 6–12 hours before mixing, feed your sourdough starter so it’s bubbly, active, and at its peak.
- Step 2: In a small bowl, combine the rolled oats and hot (not boiling) water. Stir and let them sit for 15–20 minutes to soften and cool.
- Step 3: In a large bowl, whisk together the warm water, active starter, maple syrup, and maple extract (if using). Add the soaked oats and whisk again to break them up.
- Step 4: Add the bread flour and salt, then mix with your hands until all the flour is hydrated and a rough, shaggy dough forms. Cover and let rest for 20 minutes.
- Step 5: Lightly wet your hands. Grab one side of the dough, stretch it upward, and fold it over the center. Rotate the bowl 90° and repeat for all four sides. Cover and rest 15 minutes. Repeat this stretch and fold sequence 3 more times (4 sets total) with 15-minute rests between.
- Step 6: Cover the bowl and let the dough rise until puffy, bubbly, and roughly doubled in size. This can take 4–12 hours or longer, depending on temperature and starter activity. A straight-sided container helps track the rise.
- Step 7: Lightly flour your counter and turn the dough out. Gently stretch it into a loose rectangle. Fold the long sides toward the center like a letter, then fold the short sides the same way. Flip seam-side down and gently tighten into a round ball by cupping your hands and pulling the dough toward you.
- Step 8: Dust a proofing basket with rice flour. If you want oats on the loaf’s exterior, sprinkle extra rolled oats in the bottom of the basket. Place the dough seam-side up in the basket. Cover and refrigerate for 12–16 hours.
- Step 9: Preheat your oven to 450°F with a lidded Dutch oven inside. Once preheated, continue heating for 30–60 minutes.
- Step 10: Turn the dough out onto parchment or a bread sling so it’s seam-side down. Score the top with a sharp knife. Carefully place 2 ice cubes inside the Dutch oven to create steam. Lower the dough into the pot, cover, and bake for 40 minutes.
- Step 11: Remove the lid and bake for another 5–10 minutes until the crust reaches your desired color.
- Step 12: Transfer the bread to a wire rack and cool for at least 2–4 hours before slicing.
Tips & Variations
- Use old-fashioned rolled oats for soaking to ensure they absorb water well and don’t make the dough too wet.
- If you want a stronger maple flavor, add the optional maple syrup extract.
- Adjust salt quantity if using a different brand, as salt crystal size influences salinity.
- For oats on the crust, sprinkle extra oats in the proofing basket before placing the shaped dough.
- Use a straight-sided container for fermenting to better monitor dough expansion.
Storage
Store the bread in an airtight container or bread box at room temperature for up to 3 days. For longer storage, freeze sliced bread for up to 3 months. Reheat slices gently in a toaster or oven to restore crust crispness.
How to Serve
Serve this delicious recipe with your favorite sides.
FAQs
Should I subtract the soaking water from the warm water used in the dough?
No, the soaking water used for the oats is separate and not subtracted from the warm water in the dough. Make sure the oats absorb the soaking water fully before adding them to the dough to prevent excess moisture.
What should I do if my dough feels too wet and hard to shape?
This can happen if the oats aren’t fully soaked or if the dough overferments, breaking down gluten structure. Make sure to soak the oats properly and keep an eye on fermentation time and temperature to maintain dough elasticity for shaping.
PrintMaple Oat Sourdough Bread Recipe
This Maple Oat Sourdough Bread recipe combines the rich, earthy flavors of sourdough with the natural sweetness of maple syrup and the hearty texture of rolled oats. The bread is made by soaking oats, mixing with an active sourdough starter, and slowly fermenting the dough before baking it in a Dutch oven to achieve a crusty exterior and soft, flavorful crumb. Perfect for breakfast, sandwiches, or as a sweet-savory snack.
- Prep Time: 25 minutes (plus 6–12 hours starter activation and 12–16 hours cold proofing)
- Cook Time: 45–50 minutes
- Total Time: 19–24 hours including fermentation and proofing
- Yield: 1 large loaf, about 12 slices 1x
- Category: Bread
- Method: Baking
- Cuisine: American
- Diet: Vegetarian
Ingredients
Soaked Oats
- 1 cup (80 grams) rolled oats
- ½ cup (120 grams) hot water
Dough
- 1 ¼ cups (300 grams) warm water (80-90℉)
- ½ cup (100 grams) active sourdough starter
- ¼ cup (85 grams) maple syrup
- 1 teaspoon maple syrup extract (optional, for stronger maple flavor)
- 4 cups (480 grams) bread flour
- 4 teaspoons (11 grams) Diamond Crystal Kosher Salt (use 2 teaspoons if using Morton’s brand, table salt, or adjust by weight)
Additional
- Rice flour for dusting proofing basket
- 2 ice cubes for steam in Dutch oven
Instructions
- Activate Starter: About 6–12 hours before mixing, feed your sourdough starter so it’s bubbly, active, and at its peak activity to ensure a good rise.
- Soak Oats: In a small bowl, combine the rolled oats and hot (not boiling) water. Stir and let them sit for 15–20 minutes to soften and cool, preparing them for incorporation into the dough.
- Mix Dough: In a large bowl, whisk together the warm water, active sourdough starter, maple syrup, and maple syrup extract if using. Add the soaked oats and whisk again to break them up. Add the bread flour and salt, then mix with your hands until all the flour is hydrated and a rough, shaggy dough forms. Cover and let the dough rest for 20 minutes.
- Perform Stretch and Folds: Lightly wet your hands and stretch one side of the dough upward, folding it over the center. Rotate the bowl 90° and repeat for all four sides. Cover and rest the dough for 15 minutes. Repeat this stretch and fold process three more times for a total of four sets, resting 15 minutes between sets to develop gluten structure.
- Bulk Fermentation: Cover the bowl and allow the dough to rise until it is puffy, bubbly, and roughly doubled in size. This may take anywhere from 4 to 12 hours depending on room temperature and starter activity. Using a straight-sided container helps monitor fermentation progress.
- Pre-Shape Dough: Lightly flour a clean counter and turn the dough out onto it. Gently stretch the dough into a loose rectangle. Fold the long sides toward the center like a letter, then fold the short sides in the same way. Flip the dough seam-side down and gently tighten it into a round ball by cupping your hands and pulling the dough toward you.
- Final Proof: Dust a proofing basket with rice flour. If desired, sprinkle extra rolled oats in the bottom of the basket to coat the outside crust of the bread. Place the shaped dough in the basket seam-side up. Cover the basket and refrigerate the dough for 12–16 hours for a slow, cold proof.
- Preheat Oven and Dutch Oven: The next day, place a lidded Dutch oven inside your oven and preheat the oven to 450°F (232°C). Once the oven is preheated, continue heating the Dutch oven for an additional 30–60 minutes to ensure it is thoroughly hot for baking.
- Score and Bake: Carefully turn the dough out onto a sheet of parchment paper or a bread sling so the seam side is down. Score the top of the dough with a lame or a sharp knife to allow expansion. Place 2 ice cubes inside the preheated Dutch oven to generate steam, then lower the dough (with the parchment) into the pot. Cover and bake for 40 minutes. Remove the lid and bake for an additional 5–10 minutes until the crust deepens to your desired color and crispness.
- Cool Bread: Transfer the baked bread to a wire rack and let it cool completely for at least 2–4 hours before slicing. This allows the crumb to set and prevents gumminess.
Notes
- Storage: Store the bread in an airtight container or bread box at room temperature for up to 3 days. For longer storage, freeze sliced bread for up to 3 months and toast directly from the freezer.
- Oat Soaking: Ensure oats fully absorb the hot water and the mixture cools before adding to dough to avoid overly wet dough.
- Salt Variations: Adjust the quantity of salt depending on the brand you use; Diamond Crystal vs Morton’s kosher salt have different volumes by weight.
- Proofing Time: Bulk fermentation times can vary widely based on ambient temperature and starter strength; patience is key to good flavor and texture.
- Baking Vessel: Use a heavy lidded Dutch oven for optimal crust development and steam retention during baking.
Keywords: Maple oat sourdough bread, sourdough bread, maple syrup bread, oat bread, homemade bread, artisanal bread, fermented bread